

This tutorial shows the step by step process of how to create an African map using Adobe Photoshop CS6.
All Steps in this article need to be taken patiently to finish successfully.
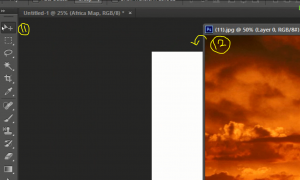
Step 1: Open Adobe Photoshop CS6
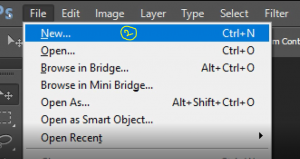
Step 2: Go to “File” in the menu Tab and select “New”
Step 3: Fill the “New” dialog box as displayed below

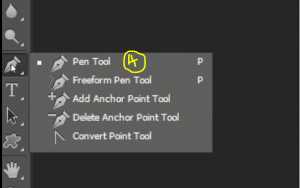
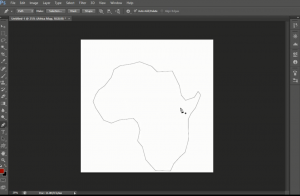
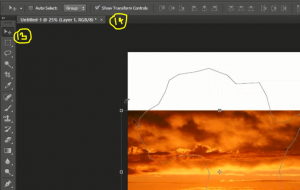
Step 4: Go for the “Pen Tool” on the Tools Panel
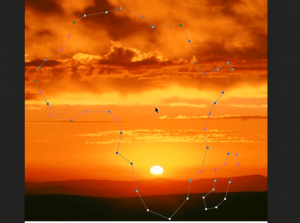
Step 5: Draw the map as showing below, Dot by dot.
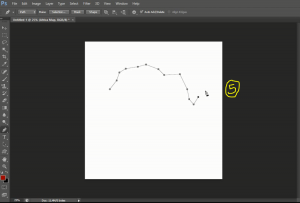
This is the final map draw
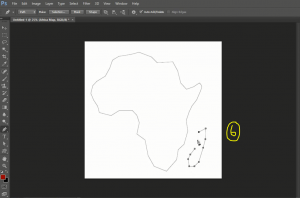
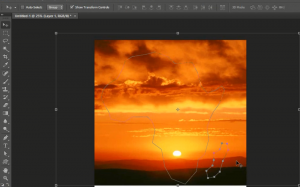
Step 6: Add the Madagascar Map at the right bottom. Use the “Pen tool” as well
Now, we are done drawing the Map paths using the Pen Tool. We have to bring our favorite image background .
Continue…
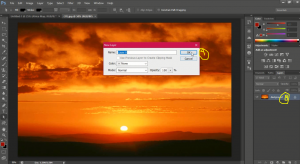
Step 7: Open your preferred image with Photoshop

Step 8: Double-click on the background layer showing in the layers panel (If you can’t find the Layers panel, tap F7)
Step 9: Click Ok
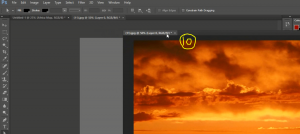
Step 10: Click The Document Title (Hold and pull out)
Step 11: Select the “Move tool” in the Tools panel
Step 12: Click and Drag the image background into the Main document where your path is
Step 13: Now on the main document. Click the “Move Tool” on the Tools panel
Step 14: Select “Show transform controls” on the options bar and adjust your background
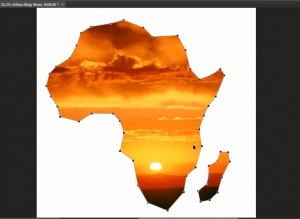
You should have your background covering your document this way
Step 16: Select the “Path selection tool” from the tools panel

Step 17: Select your background layer from the “Layers panel”
Note: Ensure you use the Shift key to select both paths (Hold the shift key and Select both path)
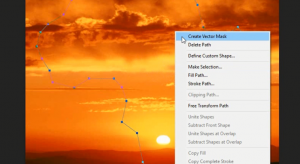
Step 18: Now, right click the path, and select “Create Vector Mask”
You should have this.
Step 19: Select the “Text Tool” from the Tools panel and write your preferred text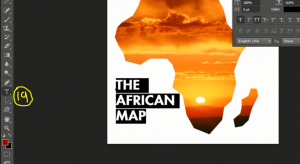
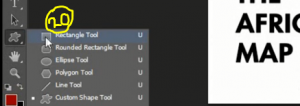
Step 20: To have the shape around the text, Select the “Rectangle tool” from the “Shape tools” on the Tools panel
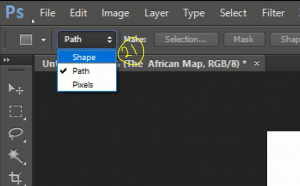
Step 21: At the options bar, Ensure you select the “Shape”
Step 22 – Draw you three different shapes to cover the texts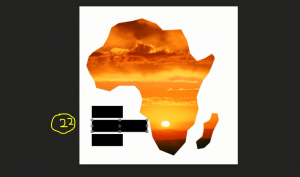
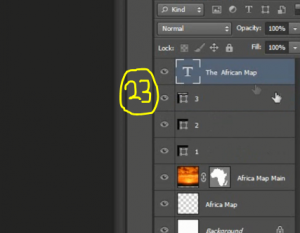
Step 23: Go to the layers panel, Drag the “Text layer” to the top
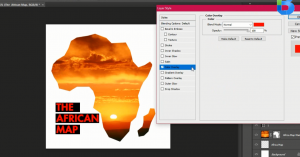
Note – You will have the text on top. Further, double-click on the “text layer” to get the Layer styles Pop-up
After that – Click the color overlay and select your preferred color. Then select Ok.
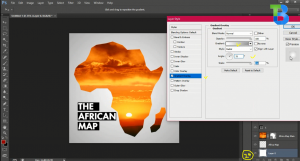
Step 24 – Double click on the last layer, which is the white background layer. The Layer Style pops up, Select the gradient and provide your preferred colors
That is it.
Also, Learn About trending social apps
Watch the Video Tutorial below (The African Map)
![]()
Leave a Reply