
Welcome to this step by step tutorial, you will be learning about How to Install and Configure File Screening using File Server Resource Manager (FSRM) on Windows Server 2012 R2.
File Server Resource Manager is a pack of tools for Windows Server® 2008 or above that allows administrators to control and manage the quantity and type of data files that is stored on their network or servers.
Furthermore, File Screening is a tool part of the FSRM Pack of tools. It helps to Manage the type of data format stored on the server or network storage media.
The Step by step process below shows how to Install FSRM and Configure File Screening
Installing FSRM.
Prerequisite: Most of all, you should have a Domain Network configured and at least one client computer for testing after configuration. Also, Configure File Share or DFS for central file access to spice up our FSRM Configuration
Computers Used: DC1 (Domain Controller installed with Server 2012 R2) and a Client Computer (Installed with Windows 10)
Installing FSRM on DC1
Step 1
First of all, Go to Server Manager

Step 2
Select Manager – Add Roles and Features Wizard
Step 3
In addition, Select the “installation Type on the left panel” and choose “Role-Based or feature-based installation” and go for “Next”

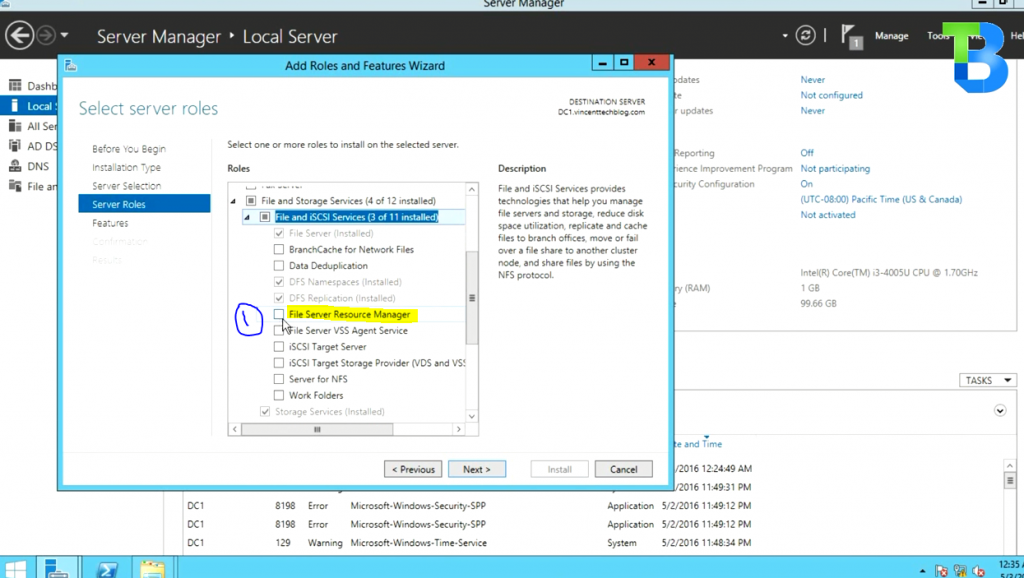
Step 4
Also, expand “File and Storage Services” – Expand “File and iSCSI Services” and Select “File Server Resource Manager” Select Add Features from Pop up Dialog. And Select “Next”
Step 5
In addition, Select “Next” on the Select Features page
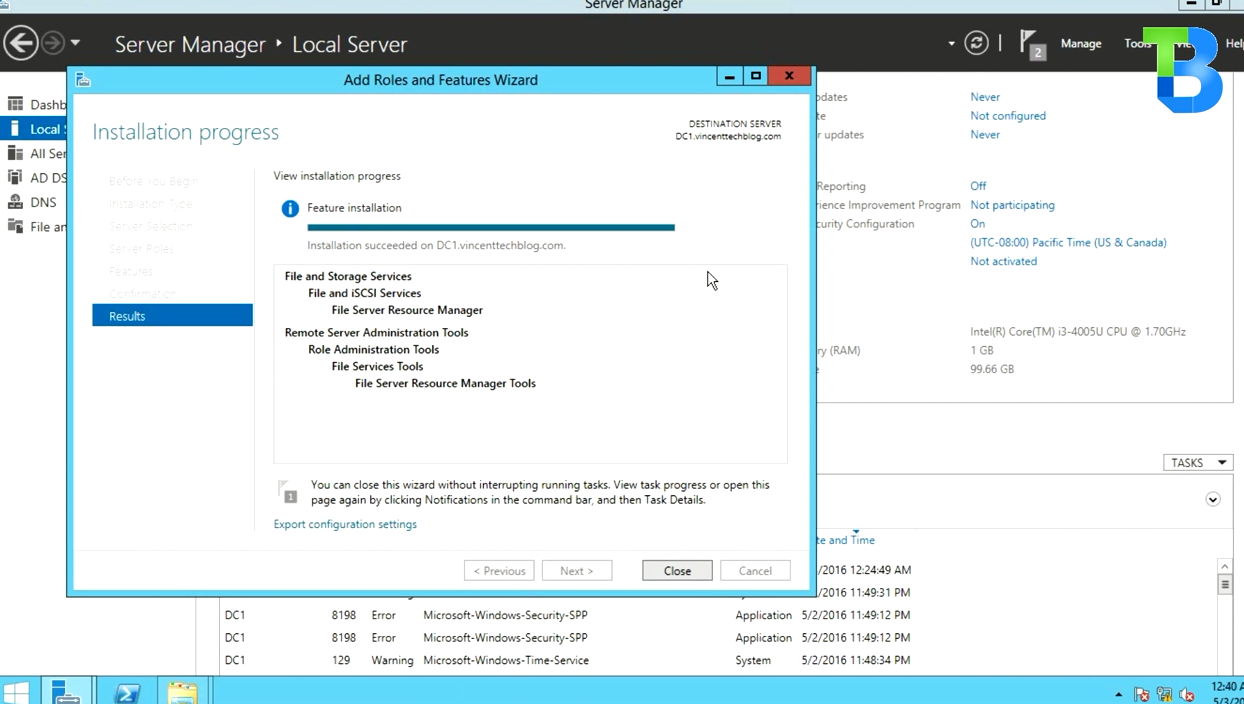
Step 6
As a result, Select “Install” on the confirm Installation Selections page
Configuring File Screening Using FSRM on DC1
When installation completes, Restart is not required
Step 1
On the Server Manager Console. Select “Tools” on the right top corner and choose “File Server Resource Manager”

Step 2
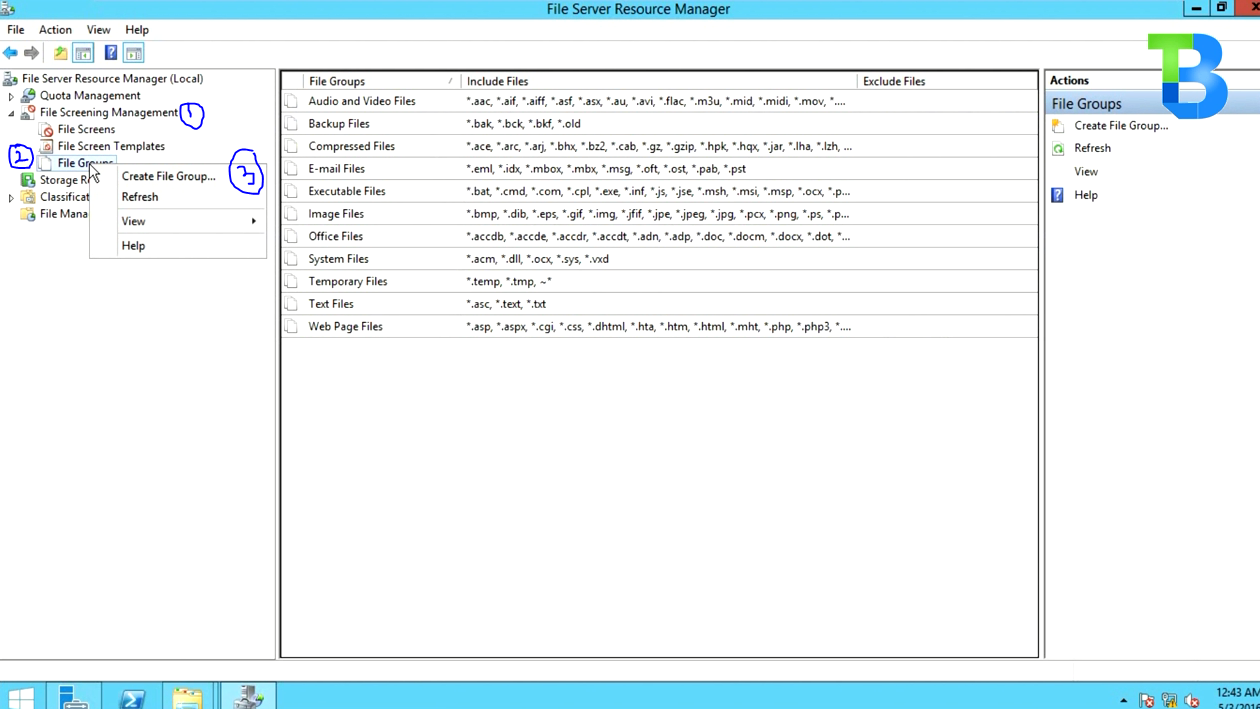
On the File Server Resource Manager console, Select “File Screening Management -> File Group”.
Right-Click on “File Groups”. Select “Create File Group
Step 3
Name your file group and add file extensions, then select “OK”

Step 4
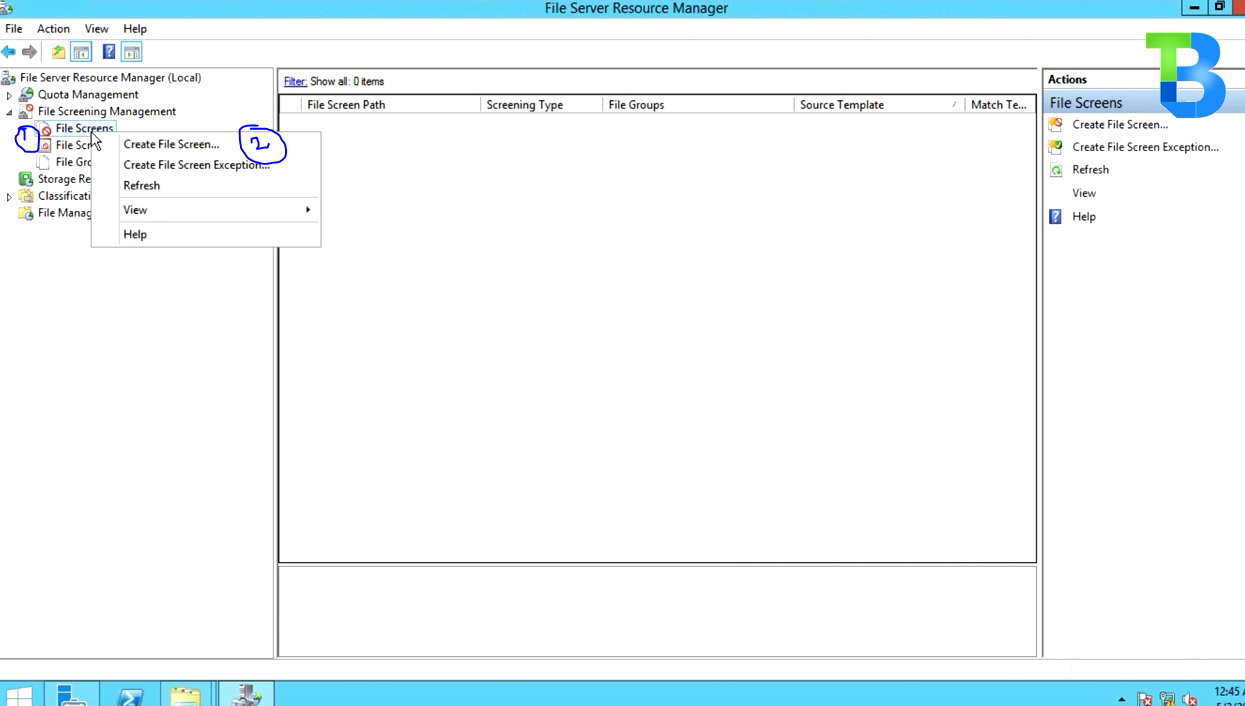
Thereafter, Switch to File Screen utility on the left pane. Right-Click and Select Create File Screen
Step 5
From here, Browser for File Screen Path
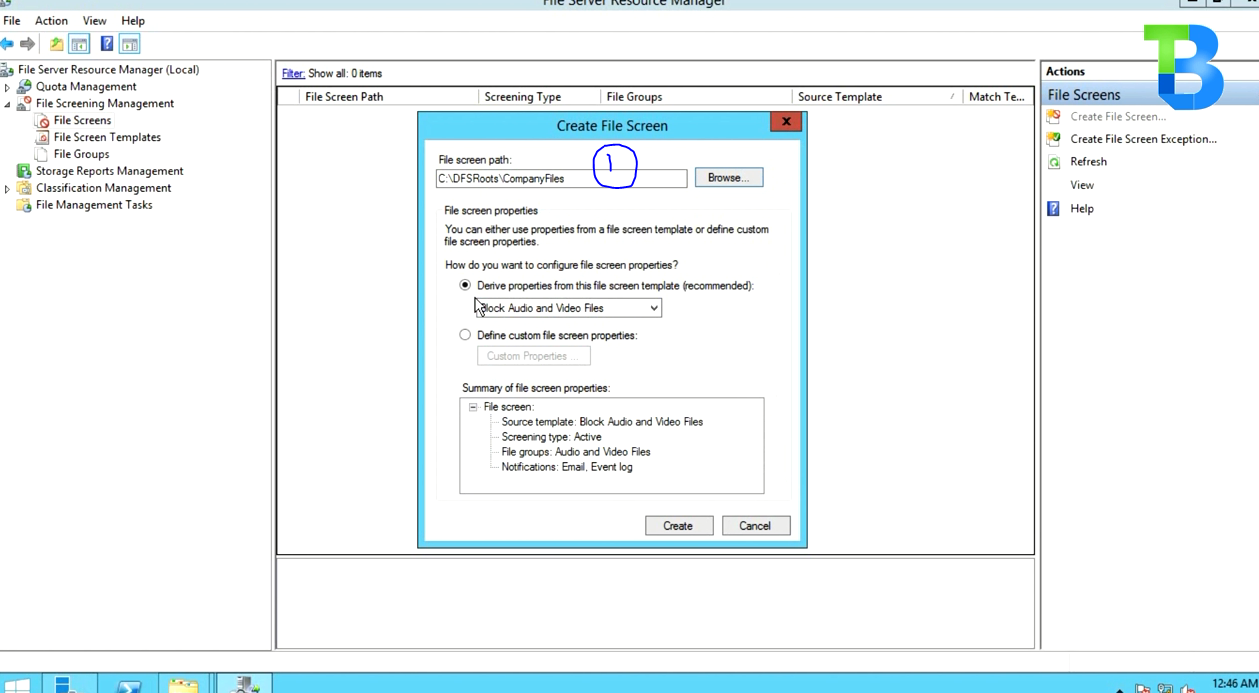
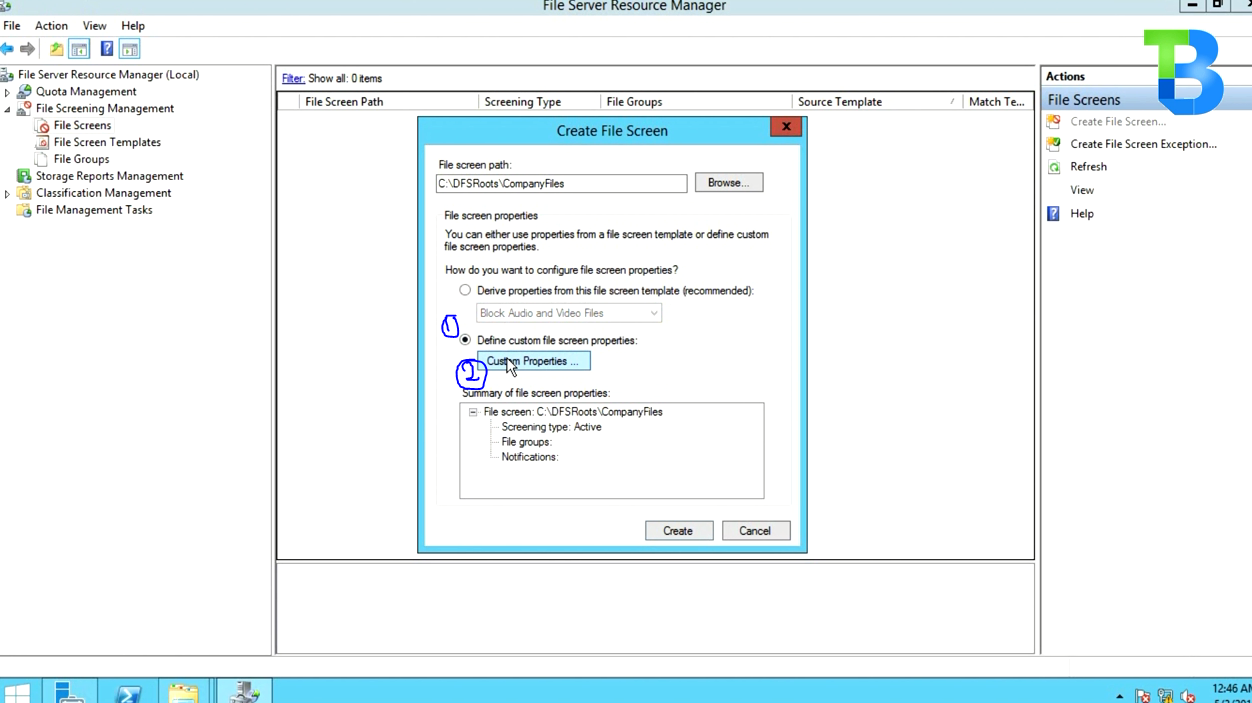
Step 6
Furthermore, Select “Define Custom File Screen Properties” and choose “custom Properties”
Step 7
Allso, under the “File Groups” Section, select “Your file group you created. Ours is “Graphic Files” and choose OK
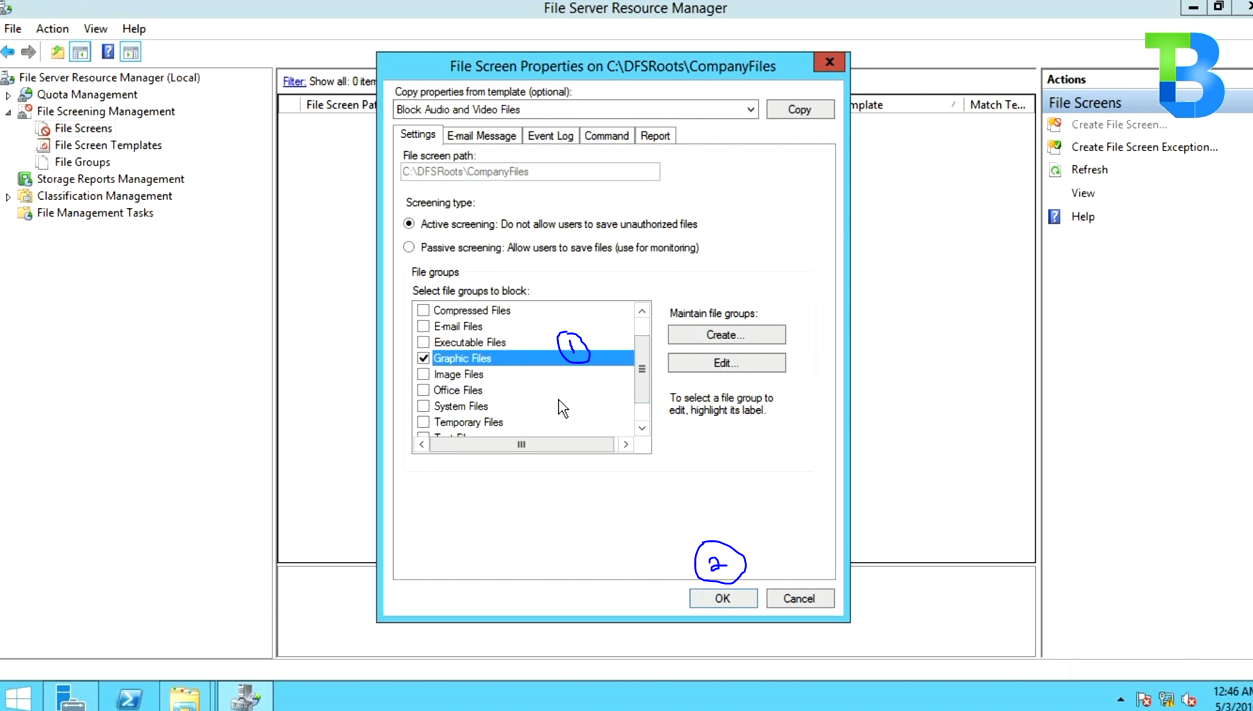
Step 8
In addition, Select “Create”

Step 9
Finally, Save as a template with your preferred name. Our is “Graphic files template” and choose OK

We are done.
Therefore, next is to test the File path selected by Storing Graphic Files with the format we block and see our file screen in operation.
OR
Watch Video Tutorial
[…] In this tutorial you would learn to generate the storage report of you FSRM Policies you have lead down using Disk Quota or File Screening. […]
[…] Read also Configuring File screening on Windows Server 2012 R2 […]