
Picking up from where we stopped in Part 1, this is the continuation of Developing REST API with Deno where we talked about the benefits of Deno and built an API that was persisting in the Browser. We’ll continue with integrating Deno and PostgreSQL.
In this post, we’ll use one of the best database open-source platforms called PostgreSQL. Download & Install if you don’t already have it installed.
Create Database User
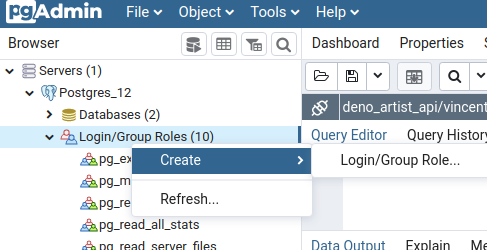
From pgAdmin4 go to Servers > PostgreSQL Server Name > Login/Groups Roles right-click on Login/Groups Roles and select Create > Login/Group Role…
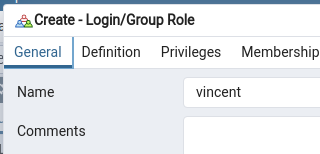
Now specify, the username in the General tab, Mine is ‘vincent’
in the Definition tab, specify the password, Mine is ‘vincent’

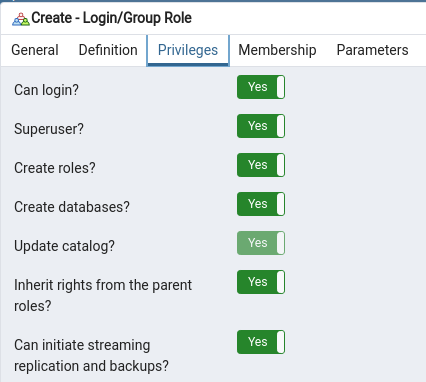
Now, in the Privileges tab, specify the privileges as i have done below and click Save;
Creating Database, Table & Columns
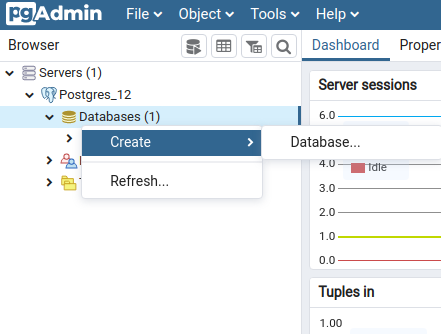
From pgAdmin4 go to Servers > PostgreSQL Server Name > Databases right-click in Databases and select Create > Database
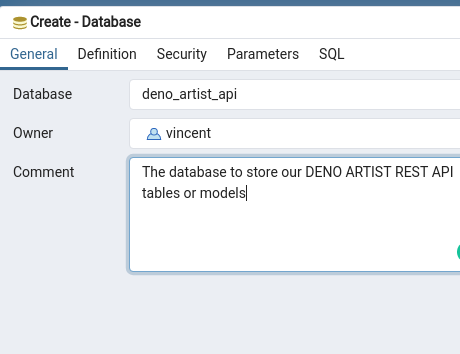
On the pop-up dialog, specify you database name, ours is deno_artists_api, you’ll notice in the image below, that I gave a descriptive comment
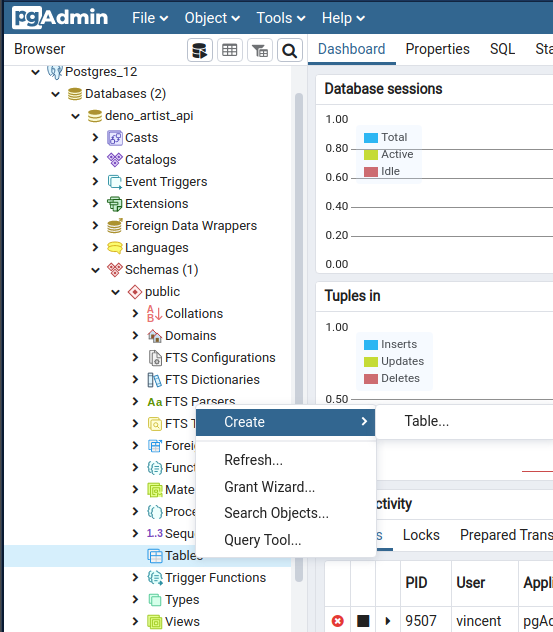
Click on Save. Now let us create a table, navigate to Databases > deno_artists_api > Schemas >Public > Tables right-click and select Create > Table…
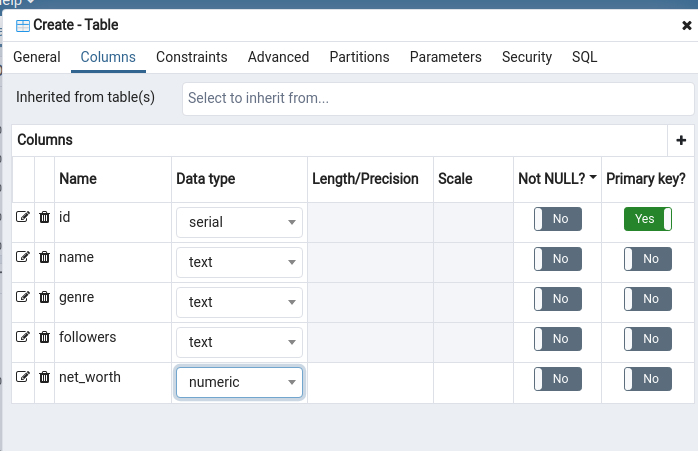
Give a table name in General tab, ours is artists and navigate to the Columns tab, specify the column names and specify the primary key as seen in the image below
Setup Denon for files-watch
Before getting started with integrating PostgreSQL, let us use the Denon module to watch our project (this is similar to nodemon in NodeJS) so we don’t have to keep restarting it manually.
Current files Structure is:
 controllers
   - artists.ts
 - config.ts
 - data.ts
 - denon.json
 - routes.ts
 - server.ts
 - types.ts
 - .env
 - .env.sample
 - .gitignore
Create a denon.json
{
  "$schema": "https://deno.land/x/denon/schema.json",
  "scripts": {
    "start": {
      "cmd": "deno run server.ts",
      "allow": ["env", "net", "read"]
    }
  },
  "logger": {
    "debug": true
  }
}
To Run Execute the command below:
$ deno start
Setup dotenv
Setup ENV Variables for Security, so when our project is hosted. Our credentials are not exposed to the public.
Paste the code below into our .env file.
PORT=7000
DB_NAME=deno_artist_api
DB_PASSWORD=vincent
DB_USER=vincent
DB_PORT=5432
DB_HOSTNAME=localhost
Now paste the following code into our config file to enable us connect to our PostgreSQL database
Config.ts file
import { config } from 'https://deno.land/x/dotenv/mod.ts';

const dbConn = {
    user: config().DB_USER,
    database: config().DB_NAME,
    password: config().DB_PASSWORD,
    hostname: config().DB_HOSTNAME,
    port: parseInt(config().DB_PORT)
};

export { dbConn };
Now let us update our server.ts file. Just as we had before in the Part 1 of this post.
import { Application } from "https://deno.land/x/oak/mod.ts";

// Added
import { config } from "https://deno.land/x/dotenv/mod.ts";

import router from "./routes.ts";

// Update
const port = config().PORT || 5000;
const app = new Application();

app.use(router.routes());
app.use(router.allowedMethods());

console.log(`Server is running on port ${port}`);

// Updated
app.listen({ port: +port });
The new data.ts file is as shown below;
import { Client } from "https://deno.land/x/postgres/mod.ts";
import { dbConn } from './config.ts';

// Initialize Postgres Client
export const client = new Client(dbConn)
The Controller/artists.ts file is as shown below to reflect the PostgreSQL connection
Add an Artist
import { client } from '../data.ts';
...
...
...
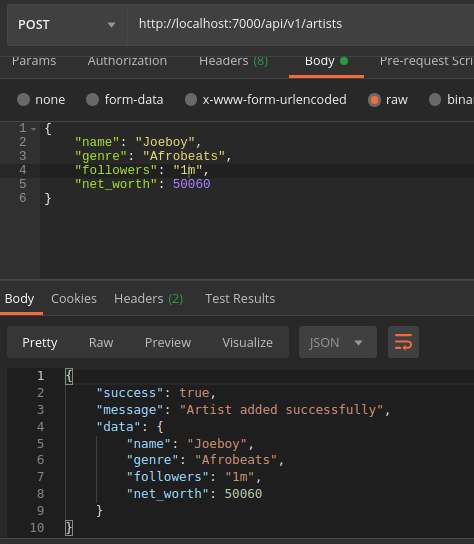
// @route POST /api/v1/artists/
const addArtist = async ({
request,
response,
}: {
request: any;
response: any;
}) => {
const body = await request.body();
const artist = body.value;
if (!request.hasBody) {
response.status = 400;
response.body = {
success: false,
message: 'Ensure to enter data',
};
} else {
try {
await client.connect();
const result = await client.query(
'INSERT INTO artists(name,genre,followers,net_worth) VALUES($1,$2,$3,$4)',
artist.name,
artist.genre,
artist.followers,
artist.net_worth
);
response.status = 201;
response.body = {
success: true,
message: 'Artist added successfully',
data: artist,
};
} catch (error) {
response.status = 500;
response.body = {
success: false,
message: error.toString(),
};
} finally {
await client.end();
}
}
};
...
...
...
export { getArtists, getSingleArtist, addArtist, updateArtist, deleteArtist };
Denon restarts our server automatically. Lets test in Postman
Get an Artist
...
...
...
// @desc Get all Artists
// @route GET /api/v1/artists
const getArtists = async ({ response }: { response: any }) => {
    try {
        await client.connect();

        const result = await client.query('SELECT * FROM artists');
        const artists = new Array();

       // Postgres in Deno, however, doesn't respond with
       // objects as desired, so we have to arrange
       // the data as needed.

        result.rows.map((artist) => {
            let obj: any = new Object();
            result.rowDescription.columns.map((el, i) => {
                obj[el.name] = artist[i];
            });
            artists.push(obj);
        });

        response.status = 200;
        response.body = {
            success: true,
            count: result.rowCount,
            message: 'Artists retrieved successfully',
            data: artists,
        };
    } catch (error) {
        console.log('the error', error)
        response.status = 500;
        response.body = {
            success: false,
            message: error.toString(),
        };
    } finally {
        await client.end();
    }
};
...
...
...
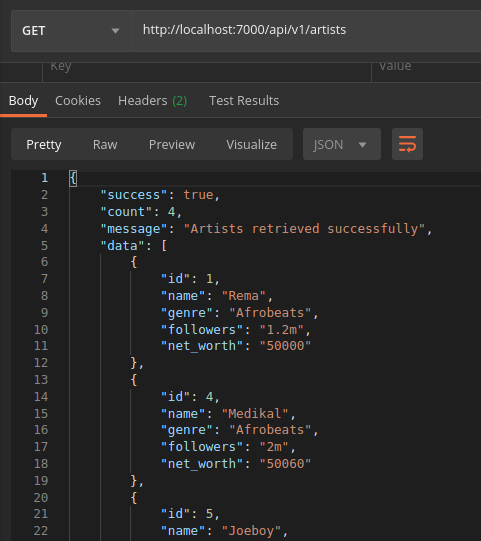
Denon should automatically restart our server after save. Let us go to Postman and Test
Get a Single Artist
...
...
...
// @desc Get an Artists
// @route GET /api/v1/artists/:id
const getSingleArtist = async ({
    params,
    response,
}: {
    params: { id: string };
    response: any;
}) => {
    try {
        await client.connect();
        const result = await client.query(
            'SELECT * FROM artists WHERE id = $1',
            params.id
        );

        if (result.rows.toString() === '') {
            response.status = 404;
            response.body = {
                success: false,
                message: `No artist found with id ${params.id}`,
            };
            return;
        } else {
            const artist: any = new Object();
            result.rows.map((a) => {
                result.rowDescription.columns.map((el, i) => {
                    artist[el.name] = a[i];
                });
            });
            response.body = {
                success: true,
                message: 'Artist Retrived Successfully',
                data: artist,
            };
        }
    } catch (error) {
        response.status = 500;
        response.body = {
            success: false,
            message: error.toString(),
        };
    } finally {
        await client.end();
    }
};
...
...
...
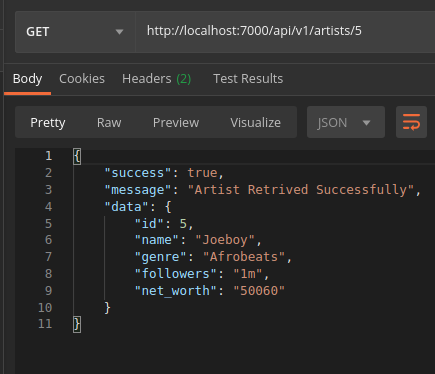
Let us Test
Update an Artist
...
...
...
// @desc update an Artist
// @route PUT /api/v1/artists/:id
const updateArtist = async ({
    params,
    request,
    response,
}: {
    params: { id: string };
    request: any;
    response: any;
}) => {
    await getSingleArtist({ params: { id: params.id }, response });

    if (response.status === 404) {
        response.status = 404;
        response.body = {
            success: false,
            message: response.body.message,
        };
        return;
    } else {
        const body = await request.body();
        const artist = body.value;
        if (!request.hasBody) {
            response.status = 400;
            response.body = {
                success: false,
                message: 'Ensure to enter data',
            };
        } else {
            try {
                await client.connect();
                const result = await client.query(
                    'UPDATE artists SET name=$1,genre=$2,followers=$3,net_worth=$4 WHERE id=$5',
                    artist.name,
                    artist.genre,
                    artist.followers,
                    artist.net_worth,
                    params.id
                );
                response.status = 200;
                response.body = {
                    success: true,
                    message: 'Artist updated successfully',
                    data: artist,
                };
            } catch (error) {
                response.status = 500;
                response.body = {
                    success: false,
                    message: error.toString(),
                };
            } finally {
                await client.end();
            }
        }
    }
};
...
...
...
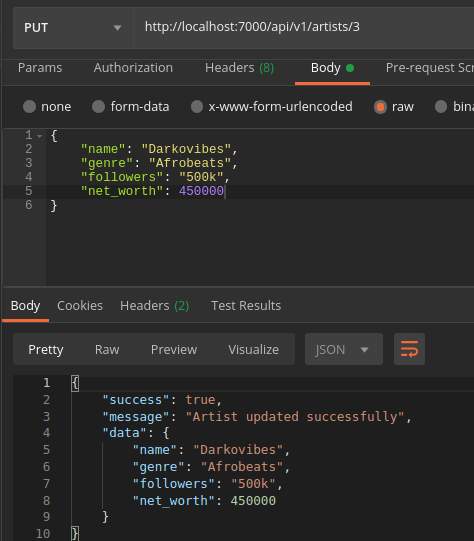
Let us try and update an Artist
Delete/ Remove an Artist
...
...
...
// @desc Remove an Artist
// @route DELETE /api/v1/artists/:id
const deleteArtist = async ({
    params,
    response,
}: {
    params: { id: string };
    response: any;
}) => {
    await getSingleArtist({ params: { id: params.id }, response });
    if (response.status === 404) {
        response.status = 404;
        response.body = {
            success: false,
            message: response.body.message,
        };
    } else {
        try {
            await client.connect();
            const result = await client.query(
                'DELETE FROM artists WHERE id=$1',
                params.id
            );
            response.status = 204;
            response.body = {
                success: true,
                message: `Artist with the id ${params.id} Successfully deleted`,
            };
        } catch (error) {
            response.status = 500;
            response.body = {
                success: false,
                message: error.toString(),
            };
        } finally {
            await client.end();
        }
    }
};
...
...
...
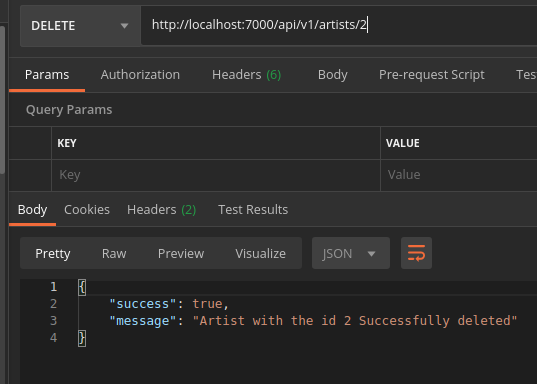
Let us test the the delete functionality using Postman
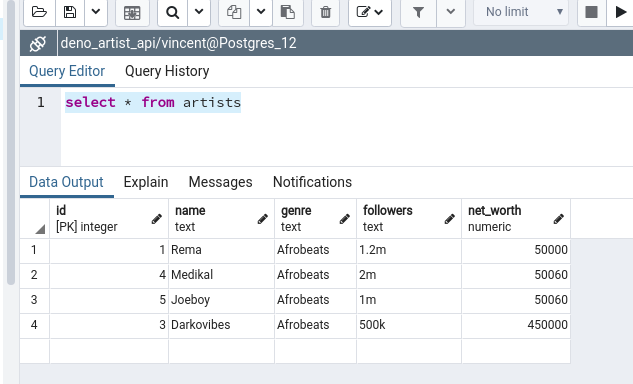
Great!, now we no longer have to persist our data in Browser, Lets see how the data shows up in our database
Find the Updated Github REPO and play around with the data.
Summary
We have successfully integrated PostgreSQL database with our Deno REST API, in future we would be integrating Authentication and Web Tokens. Till then, Keep winning!.
Kindly point out any oops you might come across. Will be much appreciated. Thank you!
Discussion
Comments
Join the conversation below.